14 Essential Apartment Cleaning Tips Professionals Swear By
TL;DR. A professional apartment cleaning checklist runs 14 steps, not 40, and the order matters more than the length: top to bottom, clean rooms before dirty rooms, floors last in every room. Apartments concentrate dust faster than houses because the footprint is smaller, the HVAC is shared, and balconies dump desert grit through every track. Color-coded microfiber stops cross-contamination, hard-water scale needs a 0000 steel wool pad and a real mineral descaler, and disinfectants need dwell time to do anything at all.
Contents
- 1 Why apartment cleaning is different from house cleaning
- 2 The order pros clean in (and why it matters)
- 3 The 14-point checklist
- 3.1 Tip 1: Start with a 10-minute reset, not a deep clean
- 3.2 Tip 2: Use color-coded microfiber instead of one rag
- 3.3 Tip 3: Vacuum before you mop, every time
- 3.4 Tip 4: Treat HVAC vents and return grilles as a separate task
- 3.5 Tip 5: Clean balcony sliding-door tracks with a brush and a vacuum
- 3.6 Tip 6: Tackle hard-water scale on glass and faucets correctly
- 3.7 Tip 7: Wipe the bathroom sink and squeegee the shower after every use
- 3.8 Tip 8: Run the kitchen sink last, not first
- 3.9 Tip 9: Don’t forget the top of the fridge, the cabinets, and the door frames
- 3.10 Tip 10: Disinfect high-touch points last, with a dwell time
- 3.11 Tip 11: Glass and mirrors need plant-based soap, a squeegee, and a fine microfiber
- 3.12 Tip 12: Carpet care between professional cleanings
- 3.13 Tip 13: Reset cleaning supplies after every clean
- 3.14 Tip 14: Know when to call in a professional deep clean
- 4 Putting the checklist together
Why apartment cleaning is different from house cleaning
Most “house cleaning” advice online was written for a 2,400-square-foot single-family home with a yard and a two-car garage. That advice falls apart in an apartment. The footprint is smaller, so dust and cooking grease concentrate faster on fewer surfaces. The HVAC isn’t yours alone; risers pull air from common areas and adjacent units, which means your supply vents collect dust that didn’t start in your unit. Balcony sliding-door tracks fill with desert grit in a week. Open-plan kitchens push cooking grease directly into living-area fabrics, since there’s no door between you and the stove. And the laundry closet, the linen closet, the pantry, all the small enclosed spaces apartments use to make up for missing storage become dust traps you forget to open.
A checklist built for a house misses all of that. A checklist built for an apartment doesn’t. Our professional apartment cleaning in Las Vegas runs on a 14-step sequence that respects how apartments actually accumulate dirt.
The order pros clean in (and why it matters)
There are two ordering rules that do more work than anything else on the list. The first is top-down. Light fixtures, ceiling-fan blades, vent covers, and tops of door frames come first. Mid-height surfaces (counters, dressers, tables) come next. Floors are last. Reverse that and you’ve finished mopping right before you knock dust onto the wet floor. You’ll be mopping twice.
The second is clean-room-first. Bedrooms and living areas before kitchens and bathrooms. Bedrooms are the cleanest rooms in the apartment; kitchens and bathrooms hold the most contamination. If you start in the bathroom and then carry your cloth into the bedroom, you’ve moved bacteria. If you start in the bedroom and end in the bathroom, you haven’t.
Inside each room, move clockwise or left-to-right around the perimeter. It sounds compulsive. It is. It also means you never finish a room wondering whether you wiped that one shelf.
The 14-point checklist
Tip 1: Start with a 10-minute reset, not a deep clean
Almost every cleaning attempt that stalls out stalls out in the first ten minutes, because the person tried to start cleaning a surface that was buried under stuff. You can’t wipe a counter that has mail on it. You can’t dust a nightstand under a book and a phone charger and a half-finished glass of water.
So before any spray bottle comes out, set a ten-minute timer and just put things away. Mail in the basket, dishes in the sink, laundry in the hamper, the random shoes back to the closet. Clear surfaces. That’s it. Cleaning starts when tidying ends, not before. Skipping this step is the single most common reason a Saturday morning clean turns into an exhausting all-day project.
Tip 2: Use color-coded microfiber instead of one rag
If you use one rag for the whole apartment, you’ve spent the morning moving bathroom bacteria into the kitchen. It’s the most common cross-contamination mistake we see. The fix is cheap and immediate: color-coded microfiber. Red cloths for bathrooms, green for kitchens, blue for glass and mirrors, yellow for general surfaces. The colors aren’t decorative; they’re a forcing function so you literally can’t grab the wrong one.
Microfiber matters too, not just the color. The fibers are split fine enough to lift and hold dust electrostatically. Cotton just smears it around in a damp film. Wash microfibers separately from regular laundry, and skip the fabric softener; softener clogs the fibers and kills the static grab that makes microfiber work.
Tip 3: Vacuum before you mop, every time
Wet-mopping over grit grinds the grit into your floor’s finish. Every time. On vinyl plank, it scratches the wear layer. On hardwood, it dulls the polyurethane. On tile, it darkens the grout because the dirt becomes mud and gets pushed into the porous lines.
So vacuum first. Slow passes, into corners, under the kick plates of cabinets. Then mop. Two wet passes plus one dry microfiber pass is the pro standard. Use fresh solution per room; a dirty mop bucket just re-deposits the previous room’s grime. And on hardwood, barely damp, never wet. Excess water swells the boards and destroys the finish from underneath. A flat mop with a wrung-out pad is the right tool. A sloshing string mop is not.
Tip 4: Treat HVAC vents and return grilles as a separate task
This is the apartment-specific one most renters skip entirely. Your supply vents and return grilles aren’t just pushing your dust around; they’re pushing dust from a shared riser system that also serves your neighbors’ units and the common hallways. Look up at a supply vent in any apartment that’s been lived in for a year. You’ll see a gray halo on the ceiling around it. That’s accumulated dust from the airflow.
Once a month, unscrew the register covers and wash them in warm soapy water. Dry them fully before reinstalling, or you’ll get streaking when the AC kicks back on. Vacuum the visible part of the duct with a soft brush attachment. And replace your air filter on the schedule the landlord or HOA requires, usually every 60 to 90 days. Most renters go a year. Don’t be most renters.
Tip 5: Clean balcony sliding-door tracks with a brush and a vacuum
In Las Vegas, balcony tracks fill with desert dust, pollen, and grit faster than any other single surface in the apartment. If you can see a fine sandy line in the bottom track, that’s already grinding against your door rollers every time you open the slider. Left long enough, it shortens the life of the door mechanism and starts making the slider stick or jump.
The right method is dry first, wet second. Vacuum the loose debris out of the track with a crevice tool. Then work the corners with a stiff bristle brush (an old toothbrush works for tight spots). Only after the dry debris is out do you wipe with a damp microfiber. Going in with a wet cloth first just makes mud in the track and pushes it deeper into the corners where you can’t reach.
Tip 6: Tackle hard-water scale on glass and faucets correctly
Las Vegas tap water is some of the hardest in the country. That cloudy white film on your shower glass, the crust around the base of the faucet, the spotting on the chrome: all of it is mineral scale, and a generic shower spray won’t touch it. Those sprays are formulated for soap scum, which is a different problem.
The pro method is a real mineral descaler (we use Envirox Mineral Shock; white vinegar works on lighter buildup) plus a 0000 steel wool pad. The grade matters. 0000 is the finest steel wool sold; it’s soft enough not to scratch chrome or tempered glass, but coarse enough to break the mineral bond mechanically while the descaler works on the chemistry. Apply the descaler, let it sit a few minutes, then work the surface in small circles with the steel wool. Skip the bleach: it doesn’t dissolve scale, and the vapors in a small bathroom aren’t worth it. For glass specifically, our full method is in our guide on how to remove hard water stains from windows.
Tip 7: Wipe the bathroom sink and squeegee the shower after every use
This is the tip that decides whether your weekly bathroom clean takes ten minutes or an hour. In hard water, soap scum bonds to glass within hours of the shower drying. Squeegee the glass while you’re still in the shower, water and all, and the scum never sets in the first place. Thirty seconds. That’s the whole task.
Same logic with the sink. A 30-second wipe with a microfiber after you brush your teeth handles toothpaste splatter and water spots before they dry. Wait a day and you’re scrubbing. Wait a week and you’re scrubbing hard. And bath mats get washed weekly, not monthly. They’re sitting wet on the floor; the math on a monthly schedule is unkind.
Tip 8: Run the kitchen sink last, not first
Most people clean the kitchen sink first because it looks like the dirtiest spot. The problem is the sink is also the rinse station for sponges, cloths, and your hands during everything else you clean. Clean it first and you’ve recontaminated it five minutes later when you rinse a cloth that just wiped the stovetop.
Save the sink for the very end. Drain it, scrub the basin, scrub the lip, then disinfect. Wipe the faucet, the handle, and the counter around the sink last. Those are high-touch surfaces, hit dozens of times a day, and they collect more bacteria than the basin itself. The dish soap dispenser too, which nobody ever cleans, but should.
Tip 9: Don’t forget the top of the fridge, the cabinets, and the door frames
In a standard one-bedroom, you’ve got somewhere between six and ten elevated surfaces that never get cleaned unless you specifically decide to clean them. Top of the fridge. Top of the upper cabinets. Top of door frames. Ceiling-fan blades. Light fixtures. The frame above the bathroom door where steam carries cooking grease and condenses.
These surfaces matter because dust on them re-coats every freshly cleaned surface below them every time the HVAC kicks on. You don’t need to touch them weekly. Once a month is plenty, as long as you also vacuum the floors monthly with enough care to actually capture what falls. Grab a step stool, a long-handled duster, and a damp microfiber. Fifteen minutes, one circuit of the apartment, done.
Tip 10: Disinfect high-touch points last, with a dwell time
Cleaning and disinfecting aren’t the same thing. Cleaning removes visible dirt. Disinfecting kills germs. Most renters spray a disinfectant and immediately wipe, which does the first job but not the second. To actually kill germs, the disinfectant has to sit wet on the surface for the dwell time printed on the label, usually somewhere between one and ten minutes depending on the product.
The high-touch points worth disinfecting weekly: doorknobs, light switches, faucet handles, fridge and microwave handles, remotes, phones, the toilet flush lever. Save these for the very end of your cleaning session. Hit them, set a timer, let them sit wet, then wipe. Doing them last also means they don’t get re-touched by hands that have been handling other dirty surfaces all morning.
Tip 11: Glass and mirrors need plant-based soap, a squeegee, and a fine microfiber
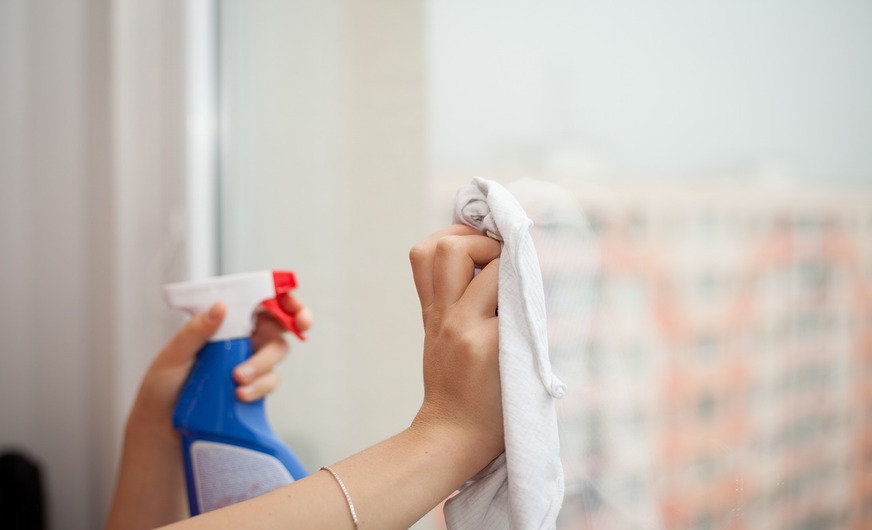
The commercial glass sprays at the grocery store leave a residue. You don’t see it on the first cleaning. You see it on the third, when streaks start showing up no matter how carefully you wipe. Switch to a few drops of plant-based dish soap in warm water, a squeegee, and a fine-weave microfiber, and the streaks go away.
Method: wet the glass generously with the soapy water. Squeegee from the top in straight overlapping strokes, wiping the blade with a dry microfiber between each pass. Buff any leftover edge moisture with the dry cloth. Apartment mirrors specifically need weekly attention, not monthly; bathroom humidity sets toothpaste and skincare splatter onto the surface fast, and once it’s set, a regular wipe won’t lift it.
Tip 12: Carpet care between professional cleanings
Renters can’t truck-mount steam-clean their own carpets, but the gap between professional visits is where most carpet damage happens. The big lever is vacuuming technique. Slow passes, overlapping rows by about a third, and going over high-traffic areas in two directions. Most people vacuum way too fast and miss most of what the machine could pick up.
Spot-treat spills within five minutes if you can. Blot with a clean white cloth, working from the outside of the spill in, and never rub. Rubbing pushes the spill deeper into the fibers and breaks the carpet’s nap. White vinegar diluted in water handles most water-soluble stains; baking soda left on overnight absorbs odors. Plan on a professional carpet steam-cleaning roughly once a year for apartments. Twelve months is the baseline; busy households with pets or kids should bring that forward.
Tip 13: Reset cleaning supplies after every clean
The difference between a one-off Saturday clean and a system you can run again next week is what happens in the last fifteen minutes. Rinse every microfiber you used, wring it out, and hang it to dry. Never store damp cloths in a closed container; mildew sets in fast in a hot apartment.
Empty the vacuum canister into the trash, take the trash bag out, and check the brush roll for hair and string. Wound-up hair is the single most common reason vacuums lose suction. Refill your spray bottles now, not the next time you reach for one and find it empty at 9pm. Restock paper towels and toilet paper from the closet so the next cleaning session, or the next ordinary day, doesn’t get interrupted. It’s five small chores. Together they’re the difference between sustainable and one-and-done.
Tip 14: Know when to call in a professional deep clean
A maintenance clean is something a renter can absolutely run on their own with this checklist. A deep clean is a different category of work. Deep cleans hit the things weekly maintenance doesn’t reach: interior of the fridge, interior of the oven, top of the upper cabinets, baseboards by hand, light fixtures, and (with truck-mount equipment) carpet and tile steam. Most households book one once or twice a year. Move-in and move-out cleans are deep cleans plus appliance interiors and inside-window detail.
This is where the products matter. Avanti uses only plant-based products certified by Green Seal, which means the cleaners that go through your apartment leave it walkable, breathable, and safe for kids, pets, and anyone with allergies the moment we leave. It’s also why apartment-cleaning makes sense as a recurring service rather than a once-and-done; the products won’t accumulate residue on your floors or in your HVAC system the way harsh chemical cleaners do. When the maintenance routine starts feeling like it’s losing ground (the corners look gray, the grout looks tired, the oven hasn’t been touched in a year), a professional deep cleaning is the reset.
Putting the checklist together
The 14 tips aren’t a one-time project. They’re a cadence. Most of them run weekly: the reset, the microfiber routine, vacuum before mop, the sink-last sequence, glass, high-touch disinfection, the supply reset at the end. A few of them run monthly: the HVAC vents, the elevated surfaces above eye level, the balcony tracks if you don’t use the slider daily. One of them runs annually: professional carpet steam-cleaning, and for most apartments, one professional deep clean a year on top of your own maintenance.
Once the supplies are set up and the routine is muscle memory, a 1-bedroom apartment runs 60 to 90 minutes of weekly maintenance. That’s the whole thing. Set a playlist, work the perimeter, finish with the sink and the disinfection, reset your supplies, done. The American Cleaning Institute maintains a renter-specific tips library worth bookmarking if you want a second reference alongside this one.
One last reminder, because it’s the thing we tell every new client during their onboarding call: a clean apartment and a safe apartment aren’t the same. The surface can look spotless and the air can still be carrying residues from the products that cleaned it. What’s left behind matters as much as what’s wiped off. That’s the part of the work most checklists don’t talk about, and it’s the part we built the company around.